Monitor Calibration & Improving Acoustics

The acoustic environment of the listening space has a major influence on the sound quality. Walls, ceiling, and floor as well as large objects like mixing consoles, tables, equipment racks, and furniture cause reflections.
Acoustic calibration minimises room influences and helps to retrieve flat and neutral frequency response. Example of compromised listening condition: excessive bass level in the monitoring room may result in a lack of bass in the final mix.

Calibration
Utilising GLM and DIP switches
All Genelec active monitoring systems have room response adjustments to compensate for room influences and retrieve a flat frequency response at the listening position. Analogue systems feature DIP switch tone controls while Smart Active Monitor (SAM) systems with digital signal processing can calibrate automatically with Genelec AutoCal.

First set the measurement microphone at the ear height in the listening position (typical height is from 1.2 to 1.4 m). Ensure that monitors are at the correct distance and height. First take a frequency response measurement. Then analyse the measurement results and adjust tone control DIP switches to retrieve a flat and balanced frequency response for each monitor.
For level calibration, first set the rotary input sensitivity control on all monitors fully clockwise. Then, adjust each level control so that all the monitors produce the same sound level at the listening position.

In the example below, the bass tilt control has been used to compensate for a low frequency boost caused by a monitor close to a large wall.

To achieve optimal sound reproduction we recommend placing two-way monitors vertically. When a two-way monitor is placed horizontally, difference in the tweeter and woofer distances will cause reduction of sound level at the crossover frequency when the listener moves sideways from the acoustical axis.

Large table or mixing console in front of the monitors may cause a boost around 160-200 Hz. Some Genelec monitors have a desktop control DIP switch compensating for this boost. GLM calibration, which is available for SAM systems, will compensate for this effect automatically.

Genelec Loudspeaker Manager (GLM)
Genelec's own audio calibration software for Genelec SAM monitors, GLM, can be downloaded here.
To enable GLM software to integrate with your SAM monitors, you’ll also need the Genelec network adaptor kit (8300-601) which includes the GLM network adaptor, 8300A calibration microphone and microphone holder, 1.8 m USB cable and Quick Connection Guide. The network adaptor connects to your Mac or PC via the supplied USB cable, and to your SAM monitors via an 5 metre Ethernet cable (which is supplied separately with each SAM monitor).
Please note that GLM 3 can't control Classic Genelec monitors. If you’re using Classic models, be sure to adjust their rear-panel DIP switches for a neutral frequency response after placement in the room.
Test Signals
In order to check the outcome of your calibration or acoustic treatment efforts by evaluating the low frequency reproduction in your audio system, you can download audio test signals here. The signals available include individual frequencies, sweep tone, pink noise and 85 Hz sinewave.
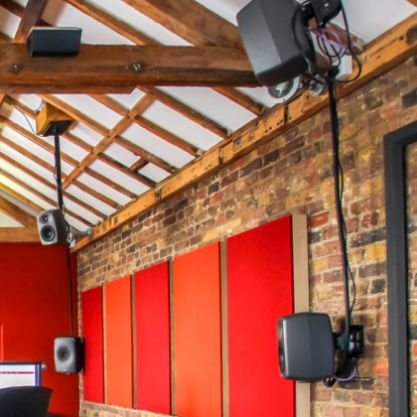
Improving Room Acoustics
Monitor calibration alone helps but may not be sufficient to resolve room acoustic problems. Audio production rooms are designed for monitoring and should receive adequate acoustic treatments to allow quality monitoring. Several room acoustic improvements are suggested here. However, using services of a professional consultant is highly recommended. Wall surfaces, ceilings and floors can be reflective, diffusive or absorptive. Combinations of these are often used.
Hard surfaces such as glass, concrete, dry wall or MDF reflect sound.
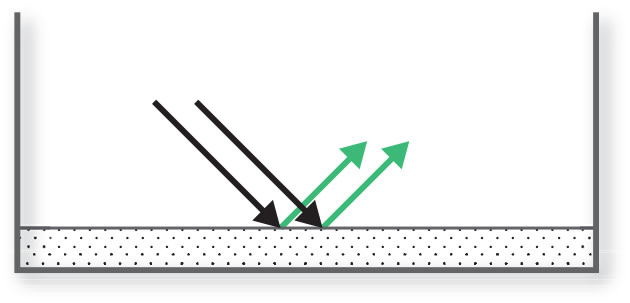
Soft materials such as rock/mineral wool, sofas, heavy curtains or thick carpets absorb sound energy. Thick layer of porous materials are needed to absorb lower frequencies.

Irregular surfaces scatter sound waves. Spreading angle depends on the diffusor design. Diffusion is usually not effective at low frequencies.

A combination of diffusive and absorptive surfaces can be very effective in reducing the audibility of reflections.

First order reflections can be high level while subsequent reflections become
smaller. Control room design minimises the first order reflection level reaching the listening area. Reflections arriving very soon after the direct sound from the monitor are called early reflections. One aim of control room design is to reduce or eliminate early reflections, having mainly the direct sound from the monitors reaching the listening area.
Flutter Echo:

Reflection-free zone around the listening area:

Several acoustic improvements can be made in a typical rectangular room where
an audio monitoring setup is installed. Here are a few suggestions pictured and explained.

A
Cut the room front corners at 30 degree angle using high-mass materials (concrete, bricks, multi layered gypsum board, etc). In case building materials have medium mass, be sure to fill the empty space behind these walls with mineral wool.
B
Use a combination of absorption and diffusion on the side wall surfaces. Note that thin layers of porous absorbers only reduce HF reflections.
C
If the room is large enough, use diffusive and absorbing element(s) on the back wall.
D
Control low frequency room resonances using a large amount of absorption material for example in the back of the room and in the ceiling. Carefully designed and located panel resonator absorbers can also be used.
E
Use a combination of absorption and diffusion above the listening area to reduce acoustic reflections from the ceiling.